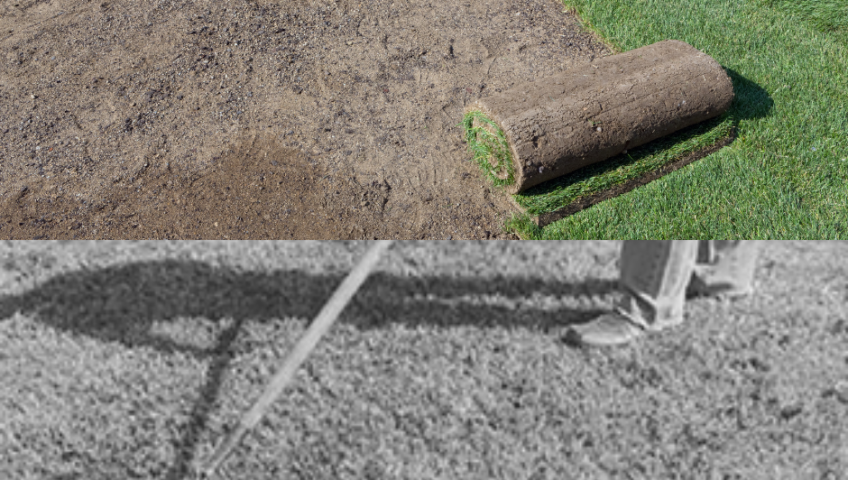
How to water new turfgrass. (SOD)

How To Water New Turfgrass Sod

Proper watering techniques are a critical aspect of lawn watering, equal in importance to the issues of when to water, and how much to water. Here are several key factors to consider when watering your new turfgrass sod:

Avoid hand sprinkling because it cannot provide the necessary uniformity, as most people do not have the patience, time, or “eye” to adequately measure what is being applied across any larger areas of lawn. The only possible exception to this guideline would be the need to syringe the surface of the grass to cool it, or to provide additional water near buildings or other heat-reflecting surfaces.

Understand the advantages and disadvantages of different sprinkler designs the type of sprinkler that you select will determine proper use.

In-Ground Systems require professional design and installation and they require routine adjustments and regular maintenance to be most effective and efficient. The greatest mistake made with most in-ground systems is the “set it and forget it” philosophy that fails to account for the changing seasonal water requirements to maximize turf grown or even allowing the system to operate during or following a multi-inch rain storm. Another frequent problem is when heads get out of alignment and apply water to the sidewalk, street or house siding, rather than to the lawn.

Hose-End Sprinklers range in complexity, cost and durability, but are highly portable and can provide uniform and consistent coverage, when properly placed on the yard and adequately maintained.

Sprinklers that do not throw the water high into the air are usually more efficient because prevailing winds are less disruptive of distribution patterns, the potential for evaporation loss is reduced and trees, shrubs and other plants do not block the pattern (or are very noticeable if they do).

Several times during the growing/watering season, routine maintenance to check for blocked outlets, leaking or missing gaskets, or misaligned sprinkler heads is important, regardless of the sprinkler design.

Select sprinklers and systems for uniformity of coverage across whatever area they are designed to water. Inexpensive hose-end sprinklers and in-ground irrigation systems can provide uniform coverage, but they can also be extremely variable and inconsistent in their coverage patterns.

Verify watering uniformity can be accomplished with a very simple and inexpensive method that uses only 4 to 6 flat-bottomed, straight-sided cans (tuna fish, cat food, etc.), a ruler and a watch.

FOLLOW THESE STEPS:

Step 1
Arrange the cans at random distances away from any sprinkler, but all within the area you assume is being covered;

Step 2
Run the sprinkler for a specific amount of time, say a half-hour OR run the water until a specific amount of water is in at least one can, say a 1.5 cm (0.5 inches)

Step 3
Measure the amount of water in each can, checking for uniformity. Some variation is expected, but if there is a difference of 10% or more between any two cans replace or adjust the sprinkler or relocate the system. Use this same technique when you are dealing with slopes on your property as well. This measuring method should also be used across an entire lawn that has an in-ground irrigation system to assure maximum coverage and uniformity.

Watering difficult areas such as slopes and under or near trees requires some special attention to achieve the maximum benefit resulting in a beautiful lawn. You need to know the water requirements for the specific trees, as well as for the grass. Despite having deep “anchor” roots, trees take up moisture and nutrients from the top six inches of soil…the same area as the grass. Trees and turf will compete for water. Watering sufficiently for the grass may over-water some varieties of trees and under-water others. A common solution is to not plant grass under the drip-line of trees, but rather use that area for perennial ground covers, flowerbeds or mulch beds.

Why is My New Sod Turning Brown? Causes + How to Save and Revive It

Dryness, dead spots and discoloration, and thinning are the last things to expect from a newly installed sod. But what does brown spots on your recently established sod mean? Wondering what the problem could be? Or how can you fix it?


New sod can turn brown due to poor installation, pest infestation, soil compaction, and inadequate water. Excess application of nitrogenous fertilizer, lack of nutrients, and premature mowing are also culprits. Identify the cause first to help save and revive sod through watering, aeration, skipping, correct height mowing and applying appropriate fungicides and pesticides.

n this blog article, I’ve gone through the causes of new sod-turning brown, ways of preventing sod from turning brown, and how to revive brown sod.

Why is my new sod turning brown?

If your newly-installed sod is spotting brown patches/coloration in certain areas, the cause could be any of the factors discussed below:

1. Lack of water

New sod needs more water than established turf to facilitate root establishment and normal growth. If you fail to water your recently-installed sod at least twice a day for the entire first-week post-installation, you risk killing some (if not most) of the developing roots due to insufficient soil water.

This eventually leads to the browning of the leaf blades of the grass plants whose roots are most affected. But how do I water new sod? Failing to soak up at least the top half of the soil every time you irrigate your turfgrass can also result in browning, even if you stick to the aforementioned watering frequency.


2. Excessive soil Nitrogen

If you applied fertilizer to your lawn soil after sod installation, then chances are high that this is the reason your new turfgrass is turning brown (including slow-release fertilizers). Developing root systems of newly-installed sod are normally too shallow to effectively absorb the excessive nitrogen nutrients infused into the soil through fertilizer application.

The excessive fertilizer burns the developing roots, consequently causing the blades of the grass to turn brown. What’s more, when you buy commercial sod, it’s usually pre-fed with ample fertilizer to see it through the anchorage period. Adding more fertilizer- therefore- results in excess.

3. Premature mowing

If you failed to take a root establishment test before your initial mowing and noticed brown spots on your turf, the most likely cause would be mowing too early. Mowing stresses new sod due to the weight of the mower and will result in brown patches if undertaken too soon. But when is the best time to mow a new sod.

4. Soil compaction

Very compact soil inhibits the water from seeping into the soil and the roots of the growing grass. This consequently causes the grass blades to turn brown due to drought/lack of water.

5. Poor Installation

If you installed the sod yourself and have never done this before, the grass is likely turning brown due to improper installation, as the sod probably lacks proper contact with the ground beneath it.

The air pocket left between the sod and the soil inhibits proper intake of moisture and nutrients by the roots, consequently browning the grass blades.

Sometimes, you’ll still have air pockets created between, even after proper installation by professionals due to the soil settling post-installation. You should therefore check for soil settling when diagnosing the causes of brown spots on your new turfgrass.


6. Pest Infestation

Various fungal organisms and insect pests thrive on feeding off newly-grown soft sod that’s still soft. This results in browning as the feed on the blade sap.

Can brown sod be saved?

Yes, brown sod can be saved and restored to its normal, lush, green appearance. The best reviving strategies take into account the cause of browning.

However, as with any problem, prevention is always better than cure, and there exist several ways in which you can prevent your newly-established sod from turning brown, as discussed below:

  1. To prevent your sod from dying/turning brown due to water deficiency, always ensure to water at the recommended intervals and until the top half of the soil is entirely soaked.
  2. To prevent your sod from browning due to excessive soil nitrogen, avoid using fertilizers during the root establishment period (typically, the first two weeks post-installation).
  3. To prevent your sod from turning brown due to air pockets caused by poor installation, avoid DIY sod installation and- instead- contract a landscaping professional to get the job done right.

How do I revive my dying sod?

You have first to identify the causes of new sod growing; you can fix and save your lawn through the following;

  1. Reviving sod browning due to soil compaction- compact soil is typically too hard and results in poor drainage that causes water to flow away rather than soak into the soil. To revive sod that has turned brown due to too compact soil, use a screwdriver or a similar sharp object to open up holes or aerate your soil, allowing water to drain into the soil and into the roots easily.
  2. Reviving sod that is browning due to air pockets between the sod and the ground– lift up the parts of the sod that are browning and fill up the space/air pocket between it and the soil with compost or topsoil to establish contact with the soil. This will consequently create a pathway for nutrient absorption through the roots.
  3. Reviving sod that is browning due to premature mowing– if you had cut your grass too soon, you can revive it by skipping a few scheduled mowings and allowing it to grow a bit taller than usual. This will allow it time to offset the initial negative effects caused by premature mowing.
  4. Reviving sod browning due to pest infestation– the best way to revive grass under fungal/pest attack is to eliminate the insects/fungi. You can visit your local agricultural extension office for guidelines on the best pesticides and fungicides for grass insect pests and fungi.

Original article posted: https://bit.ly/4e2RVUT – credits: Chris Wheeler

To Sod or to Seed

To sod or to seed is a question that has been asked for many years. There are several factors that must be considered when making this decision for your home; initial budget, size and shape of the lawn, your timeline, and the effort you are willing to put into the job.
Time & Aesthetics
Seed may be initially much less expensive, but it is labor intensive. It often requires knowledge of the seed and soil, including the soil preparation, and has little guarantee of your desired result. It often takes 6 to 12 months for seed to grow into an established lawn and up to 2 years for a newly seeded lawn to grow and fill in to a beautiful, thick lawn. Seeds can blow away in the wind, dry out or be washed away, not to mention just fail to germinate. Weeds also mix well with new seed so weed prevention and maintenance are required.

Sod looks great immediately after it is installed. It requires less soil preparation and will mitigate significantly more potential soil erosion than waiting for seed to germinate. You will often have an established, healthy lawn in about 2 weeks after the sod is installed. Young grass shoots and blades are very delicate and require proper care to mature. Sod is harvested as mature grass that has strong, healthy roots that just need to grow into your existing soil. Lawns with significant slopes are prone to soil erosion and very difficult to seed and properly water.
Value

According to several real estate sources, a well landscaped lawn can add significant value to your home. Sod can add anywhere from an additional 50% over cost to as much as five times the cost depending on the current lawn condition.

Selling

If you are selling your home, your front landscaping is the first thing that is seen. For a lawn that needs considerable attention, sod will provide an instant upgrade to your curb appeal and has proven to gain a return upon sale.

Cost
Initially, Sod and professional sod installation can get expensive, especially if you have a large lawn that needs to be covered. Although sod costs up to about $1.00 – $1.50 per square foot more than seed. You must also consider the cost of the soil preparation, post seed care, special fertilizers, and the time before you have the lawn you desire if you choose to seed your lawn.
Sod Wins

The benefits of professionally installed Sod far outweigh that of seed. The cost of seeding is much less from the start. However, once you consider the additional fertilizer and maintenance required, cost over the next 12 to 24 months is negligible. An instant, lush lawn that requires much less effort is its own reward.